Echoes of War: Legion of the Damned MissionsEchoes of War missions are unique narrative scenarios inspired by specific battles fought by the armies of the 41st Millennium. The Armies section of each of these missions provide guidance on the forces present so that you can replay the pivotal events using the armies, characters and war machines described in this book. Many of the Echoes of War missions include a map that depicts the battlefield on which the conflicts were fought.For those with a mind to historical accuracy, you’ll notice certain restrictions and rules that we use to replicate the conditions of the battle in question. Whilst the Echoes of War missions have been inspired by specific events, with a little imagination they can easily be repurposed to recreate battles of your own invention. If you choose to go down this route, you can modify these missions so that they can be fought using any combination of forces and terrain in your collection. The player that has included the Legion of Damned either as their primary detachment, or as an allied detachment, is known as ‘the Legion of the Damned player’. In the rules and missions that follow, and their opponent is known as ‘the enemy player’. №1
ECHOES OF WAR
:
Deliverance on AndraxasChief Librarian Tigurius and a Battle Company of Ultramarines have arrived on Andraxas to counter a colossal Ork invasion. Despite their skill and determination, the brave scions of Macragge are soon hard-pressed against the overwhelming number of greenskins. Things look grimmer still for Tigurius and his surviving battle-brothers when, after suffering heavy losses, the Space Marines are driven from the vast edifice known as the Great Bastion, denying them an indomitable defensive position from which to make their final stand. As the Ultramarines regroup in a valiant, but ultimately doomed, attempt to drive the Orks back and defeat them once and for all, help arrives from an entirely unexpected quarter.
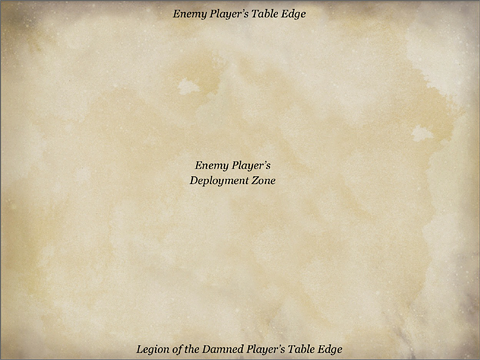 The Legion of the Damned player chooses an army from Codex: Space Marines using the Chapter Tactics (Ultramarines) special rule) and must include the Legion of Damned as an allied detachment. The Legion of the Damned player must include Chief Librarian Tigurius in his army to be his Warlord, but cannot include more than 36 other non-vehicle models in his Primary Detachment. The enemy player commands an army chosen from Codex: Orks. The enemy player must include an Imperial Strongpoint (see Warhammer 40,000: Stronghold Assault) in his army to represent the Grand Bastion, though this fortification is free – it does not cost any points, nor does it use up a fortifications force organisation slot. THE BATTLEFIELD The enemy player first places the Imperial Strongpoint anywhere on the battlefield. Then set up terrain as described in the Warhammer 40,000 rulebook, using the deployment map opposite. DEPLOYMENT Before any models are deployed, the enemy player should roll to determine his Warlord Trait. The enemy player then deploys his army, placing all of his units anywhere on the battlefield. FIRST TURN The Legion of the Damned player has the first turn. GAME LENGTH The mission uses Variable Game Length. At the end of game turn 5, one of the players must roll a D6. On a roll of 3+ the game continues, otherwise the game is over. If another turn is played, another D6 must be rolled at the end of game turn 6, and this time, the game only continues on a roll of 4+. The battle automatically ends at the close of game turn 7. VICTORY CONDITIONS At the end of the game, the enemy player wins if he has completely destroyed all of the Ultramarines models. If there are any Ultramarines models remaining, including those in units that are falling back, the Legion of the Damned player wins instead. However, units that are not on the board at the end of the game count as destroyed for the purposes of this mission. Aid From Beyond: All units from the Legion of the Damned detachment arrive from Reserve at the start of the Legion of the Damned player’s Turn 1. These units must enter play via Deep Strike as normal. №2
ECHOES OF WAR
:
Hunter or Hunted?The Dark Eldar have enacted their master plan to capture the High Marshal of the Black Templars. Should they be successful, Helbrecht can expect little more than a short but violent future in the gladiatorial pits of Commorragh at the pleasure of that dread realm’s immortal overseer. Yet despite the fiendish machinations of the Dark Eldar, otherworldly eyes observe their every movement from beyond the veil, waiting for the perfect moment to strike. They somehow know that Helbrecht yet has a vital role to play in the future of Mankind, and will do everything within their power to thwart the aliens and deny them their prize.
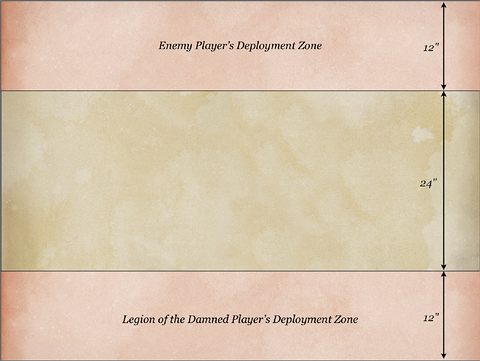 The Legion of the Damned player chooses an army from Codex: Space Marines using the Chapter Tactics (Black Templars) special rule and must include the Legion of the Damned as an allied detachment. The Legion of the Damned player must include High Marshal Helbrecht in his army to be his Warlord. The enemy player commands an army chosen from Codex: Dark Eldar. The enemy player must include Lelith Hesperax in his army, though she does not have to be his Warlord. THE BATTLEFIELD Set up terrain as described in the Warhammer 40,000 rulebook, using the deployment map opposite. DEPLOYMENT Before any models are deployed, the enemy player should roll to determine his Warlord Trait. Up to half of the enemy player’s total number units must start the game in Reserves – these units must include Lelith Hesperax, and are known collectively as Lelith’s Slavers (see Mission Special Rules below). The enemy player deploys first, placing all of his remaining units in the deployment zone depicted on the map. The Legion of the Damned player then places all of his units (with the exception of the Legion of the Damned units) anywhere in his deployment zone. FIRST TURN The enemy player has the first turn unless the Legion of the Damned player can Seize the Initiative. If a player who is due to go second wishes to Seize the Initiative, he can roll a D6 before the beginning of the first turn of the game. On the roll of a 6, he successfully seizes the initiative and goes first instead. GAME LENGTH The mission uses Variable Game Length. At the end of game turn 5, one of the players must roll a D6. On a roll of 3+ the game continues, otherwise the game is over. If another turn is played, another D6 must be rolled at the end of game turn 6, and this time, the game only continues on a roll of 4+. The battle automatically ends at the close of game turn 7. VICTORY CONDITIONS At the end of the game, the player who has scored the most Victory Points wins the game. If players have the same number of Victory Points, the game is a draw. Primary Objective At the end of the game, each player receives 1 Victory Point for each enemy unit that has been completely destroyed. Units that are falling back at the end of the game, and units that are not on the board at the end of the game, count as destroyed for the purposes of this mission. Remember that Independent Characters and Dedicated Transports are individual units and award Victory Points if they are destroyed. Secondary Objectives Slay the Warlord*, First Blood, Linebreaker. * If High Marshal Helbrecht is slain, this Secondary Objective is instead worth 3 Victory Points to the enemy player. If High Marshal Helbrecht is slain in a challenge, this Secondary Objective is instead worth 5 Victory Points to the enemy player. Night Fighting, Reserves. №3
ECHOES OF WAR
:
Phalanx in PerilThe flagship of the Imperial Fists, Phalanx, is under siege – not from without, for the moon-sized star fortress commands such murderous firepower that alone it can rival the largest battle fleet – but from within. Using his unearthly powers, the first of the Daemon Princes, Be’lakor, has spirited a host of Iron Warriors and his daemonic allies aboard Phalanx, intent on turning the guns of the mighty battle station upon Holy Terra itself. The Imperial Fists’ 3rd Company, aptly named the Sentinels of Terra, have mustered within Phalanx’s vast launch bays, intent on preventing Be’lakor from reaching the primaris fire controls systems and achieving his diabolical plan, or dying in the attempt.
The Legion of the Damned player chooses an army either from Sentinels of Terra – a Codex: Space Marines supplement or Codex: Space Marines using the Chapter Tactics (Imperial Fists) special rule and must include the Legion of the Damned as an allied detachment. The enemy player commands an army chosen from Codex: Chaos Space Marines, but can include an Allied Detachment chosen from Codex: Chaos Daemons. The enemy player must include Be’lakor in his army to be his Warlord. THE BATTLEFIELD Set up terrain as described in the Warhammer 40,000 rulebook, using the deployment map opposite. Designer’s Note: As this battle takes place aboard Phalanx, created by Rogal Dorn to be a fortress as well as a vessel, it would be appropriate to use fortifications and defence lines to represent the battlefield. Place Primary ObjectivesAfter setting up the terrain, the Legion of the Damned player places 3 Objective Markers anywhere within his deployment zone. No objective can be placed within 6" of any battlefield edge or 12" of another objective. DEPLOYMENT Before any models are deployed, the Legion of the Damned player should roll to determine his Warlord Trait. The Legion of the Damned player deploys first, placing all of his units (with the exception of the Legion of Damned units) in the deployment zone depicted on the map. The enemy player then places all of his units anywhere in his deployment zone. FIRST TURN The enemy player has the first turn unless the Legion of the Damned player can Seize the Initiative. If a player who is due to go second wishes to Seize the Initiative, he can roll a D6 before the beginning of the first turn of the game. On the roll of a 6, he successfully seizes the initiative and goes first instead. GAME LENGTH The mission uses Variable Game Length. At the end of game turn 5, one of the players must roll a D6. On a roll of 3+ the game continues, otherwise the game is over. If another turn is played, another D6 must be rolled at the end of game turn 6, and this time, the game only continues on a roll of 4+. The battle automatically ends at the close of game turn 7. VICTORY CONDITIONS At the end of the game, the player who has scored the most Victory Points wins the game. If players have the same number of Victory Points, the game is a draw. Primary Objective At the end of the game, each Objective Marker is worth 3 Victory Points to the player that controls it. Secondary Objectives Slay the Warlord, First Blood. Reserves. |
Factions > Legion of the Damned >

