In over ten millennia of war, there have been countless occasions where the actions of a few brave souls have turned the tide of a conflict. Whether the heroes of each of these stories were a band of seasoned die-hards with a score to settle, or merely some stranded survivors whose desperate situation saw them find courage they never knew they had, their brave deeds have become legend regardless.
Warhammer 40,000: Kill Team puts you in charge of a motley band of warriors, whose skill, determination and courage will be put to the test as they undertake dangerous do-or-die missions deep behind enemy lines. As each of your models acts independently from the rest of his squad, their individual actions – even a single kill – can mean the difference between victory and defeat. Whether you choose an elite team of stalwart heroes or a small horde of expendable conscripts to form your Kill Team, they must all fight with one purpose if they are to achieve their mission objectives.
Kill Teams can vary wildly in size and composition, ranging from an expendable team of murderous penal legionaries about to be sent on a suicide mission, to a pack of elite Thunderwolf Cavalry designed to hunt small bands of foemen behind enemy lines. The rules here describe how to select your very own Kill Team in preparation for its first mission.
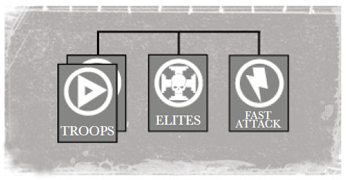
Each player can spend up to 200 points on their Kill Team, chosen from a single codex or codex supplement, and adhering to the Kill Team Detachment, shown below:
Kill Team DetachmentIn order to represent the sorts of units that would be tasked with undertaking such missions, there are a few further restrictions that you must take into account when selecting your Kill Team:
- A Kill Team must include at least four non-vehicle models. One of these models must be your Leader and three must be Specialists.
- A Kill Team cannot include any models with more than 3 Wounds or Hull Points on their profile.
- A Kill Team cannot include any vehicles with a combined Armour Value (established by adding the vehicle’s Front, Side and Rear Armour Values together) of more than 33.
- A Kill Team cannot include Flyers.
- A Kill Team cannot include any models with a 2+ Armour Save.
Every Kill Team is led by a shrewd and experienced commander. Whether they are a charismatic officer being groomed for future command, or something of a loner who prefers the relative freedom of guerilla warfare, their warriors will follow them unto death. All that matters is that it is their responsibility to see the mission completed, no matter the cost.
| Designer’s Note – Campaign Play |
| If you plan to play a number of Kill Team games as part of a campaign, ongoing narrative or gaming event, we recommend that you retain your Leader Trait between games. Alternatively, rather than rolling on the table, you could simply pick the trait that best suits your Leader’s personality and retain that trait instead. |
After choosing your Kill Team, you must determine which non-vehicle model will be your Leader. The Leader is automatically the
character model with the highest Leadership characteristic on its profile. If your Kill Team has no character models, then the Leader is automatically the model with the highest Leadership characteristic on its profile. In either case, if several eligible models are tied for the highest Leadership characteristic, you must nominate one of them to be your Leader. However, a model with the
Beast unit type or
Swarm special rule cannot be nominated as your Kill Team Leader. If your Leader does not already have the character unit type or the
Independent Character special rule, they gain the character unit type.
Your Leader is a skilled veteran of many military campaigns. At the start of every game, roll on the Leader Traits table below before you deploy your Kill Team to discover what signature tactics your Leader has to help complete the mission.
| D6 | Warlord Traits |
| 1 | A Cunning Ruse
D3+2 non-vehicle models of your choice have the Outflank special rule. |
| 2 | Quick Thinker
Your Kill Team successfully Seizes the Initiative on the dice roll of a 4+ instead of a 6. |
| 3 | Chasing Promotion
You gain 1 additional Victory Point if your Leader slays the enemy Leader in a challenge. |
| 4 | Iron Resolve
Your Leader’s Command Range is increased to 12" (see Break Tests and Command Range). |
| 5 | Been there, Seen it, Done it
Your Leader can select a special rule from one of the Specialist Categories, though this cannot be from the same category as any of your other Specialists. |
| 6 | Unshakeable Dedication to Duty
Your Leader has the Zealot special rule. |
In every theatre of war, there are fighters on either side whose courage, weapons proficiency, or sheer killer instincts can easily be lost amidst the carnage of larger scale conflicts. Yet in smaller skirmishes, the unique talents of these unsung heroes soon becomes apparent.
Whether they are grizzled and steadfast sergeants who have survived more than their fair share of wars, or perhaps even a squad’s latest recruit who shows a remarkable talent for marksmanship, these individuals are referred to as Specialists. After choosing your Kill Team and establishing who will be your
Leader, you must nominate three non-vehicle models to be Specialists. You cannot nominate your Leader, nor can you choose a model with the
Beast unit type or
Swarm special rule to be a Specialist. Each Specialist must be assigned a single special rule chosen from one of the Specialist Categories in this section. No two Specialists in the same Kill Team can choose their special rules from the same Specialist Category. The five Specialist Categories and the special rules which can be chosen from within each category are found on this page below.
A highly aggressive warrior who is a deadly exponent of the art of close combat.
A Combat Specialist may choose one of the following special rules, the full rules for which can be found in Warhammer 40,000: The Rules.
Alternatively, a Combat Specialist may choose one of the following special rules instead:
| When outnumbered in combat, a Berserk Fighter is overcome with red fury, unleashing a flurry of blows. |
At the start of any
Fight sub-phase, this model gains an additional D3 attacks if they are
locked in combat with more than one enemy model. A model that has made a
disordered charge that turn receives no benefit from Berserk Fighter.
| It is a grim skill to mercilessly and unerringly drive a weapon into a foe’s most vital regions. Smite them! |
If a target suffers an unsaved Wound from a close combat attack made by this model, the target is reduced to 0 Wounds and is removed as a casualty.
| Only a natural born killer knows just where and when to strike to cause damage with every blow. Watch them bleed. |
This model always wounds on a 2+ when making close combat attacks against non-vehicle models.
| Constant combat breeds fighters of consummate skill, able to feint, parry, and overcome. Those that survive long enough acquire a deadly efficiency. |
This model has +1 Weapon Skill.
A deadeye shot and something of a technological genius at customising weaponry
A Weapon Specialist may choose the following special rule, the full rules for which can be found in Warhammer 40,000: The Rules.
Alternatively, a Weapon Specialist may choose one of the following special rules instead:
| A warrior with a knack for turning enemy vehicles into burnt-out hulls is a valuable asset to any Kill Team. |
When making shooting attacks, this model re-rolls failed
armour penetration rolls against
vehicles and can choose to re-roll
glancing hits, in an attempt to instead get a
penetrating hit – but the second result must be kept.
| Through skilled gauging of the wind or ballistic expertise, some marksmen can hit their quarry beyond maximum range. |
The range of any ranged weapons fired by this model is increased by half. For example, this model could fire a
boltgun (Range 24") up to 36" instead. This increased range also affects
Rapid Fire and
Melta distances, but has no effect on
Template weapons.
| Kill Teams quickly learn which of their members is the most accurate, for the best marksman must take the most vital shots. |
This model has +1 Ballistic Skill.
| Knowing how to place charges or where to strike to turn an enemy vehicle into a burning wreck is a valuable skill. |
When this model hits a
vehicle in close combat, roll a D6 to determine the effect rather than rolling for
armour penetration normally:
| Whether by jury-rigging scopes, or fine-tuning an aiming mechanism, a warrior that hones their weapon becomes even deadlier. |
When selecting this special rule, pick a ranged weapon carried by this model. You can re-roll one failed
To Hit roll per turn with that weapon.
| Quick reflexes and a mind for carnage allow some to spray their fire in an arc, scything down multiple targets at once. |
When attacking with a ranged weapon that fires more than one shot, this model may target different enemy models with each shot. Announce the intended target of every shot before making any
To Hit rolls.
| Some foes think there is safety behind cover. When they find themselves in this warrior’s sights they will learn another truth. |
Cover saves cannot be taken against Wounds,
glancing or
penetrating hits caused by shooting attacks made this model.
| It is possible for skilled marksmen to lay down bursts of well-aimed firepower to pin the enemy in place. Duck or die! |
If a non-vehicle model suffers one or more hits from a shooting attack made by this model, the target must take a
Leadership test once this model has finished its attacks for that phase. This is called a Pinning test.
If the target fails the test, it must immediately
Go to Ground. As the target has already taken its saves, Going to Ground does not protect it against the fire of the weapon that caused the test – it’s too late! As long as the test is passed, a target can be called upon to take multiple Pinning tests in a single turn, but only once for each model shooting at them. If a model has already Gone to Ground, no further Pinning tests are taken.
If the special rules of a model specify that they can never be Pinned, they automatically pass this test. Such models can still Go to Ground voluntarily if they wish.
A brutal and savage fighter for whom no blow is too low and no trick too dirty.
A Dirty Fighter Specialist may choose one of the following special rules, the full rules for which can be found in Warhammer 40,000: The Rules.
Alternatively, a Dirty Fighter Specialist may choose one of the following special rules instead:
| Using a flash-concussive, kicking dust, or even throwing small objects can distract a target for a moment. And that’s all it takes. |
Any target hit in close combat by this model must take an
Initiative test at the end of the current phase. If the test is passed, all is well – they have seen through the distraction. If the Initiative test is failed, the target is reduced to Weapon Skill and Ballistic Skill 1 until the end of their next turn. Any model that does not have an Initiative characteristic (for example, non-Walker
vehicles,
buildings etc.) is unaffected by this special rule.
| The dirtiest fighters inherently know just where to stab into a weak point in armour or flesh. And they don’t stop stabbing. |
When this model makes a close combat attack, for each
To Wound roll of a 6, the target automatically suffers a Wound, regardless of its Toughness. These Wounds are resolved at AP2.
Against
vehicles, each
armour penetration roll of 6 allows a further D3 to be added to the total. These hits are resolved using their normal AP value.
| Taking out the largest, or most powerful, foes is a sure way to disrupt the enemy’s plans. Bring them down! |
This model re-rolls all failed
To Wound rolls against targets with a Wounds characteristic of 2 or more.
| Groin-kicking, eye-gouging, biting, gnashing, throat-slashing – all are fair game and valued skills to the dirty fighter. |
A target that suffers one or more hits in close combat from this model is reduced to Initiative 1 until the end of the following
Assault phase.
| There is an art to twisting a blade or aiming a blow for the most vulnerable body parts. Why wound when you can kill? |
This model re-rolls failed
To Wound rolls in close combat.
| Only a dirty fighter is likely to know where to procure the ingredients to make toxins. |
When attacking in close combat, this model always wounds their target on a 4+, unless a lower result would be required. In addition, if the Strength of this model is higher than the Toughness of their target, this model re-rolls failed rolls
To Wound in close combat.
This special rule has no effect against
vehicles.
A stoic and tenacious warrior who will not be cowed by anyone or anything
An Indomitable Specialist may choose one of the following special rules, the full rules for which can be found in Warhammer 40,000: The Rules.
Alternatively, an Indomitable Specialist may choose the following special rule instead:
| Throwing a foe down can give a fighter another second to strike. |
Any non-vehicle model that suffers one or more hits from this model in close combat moves as if it is in
difficult terrain until the end of its next turn.
A warrior naturally gifted in the art of guile and stealth, the eyes and ears of the Kill Team
Guerilla Specialist may choose one of the following special rules, the full rules for which can be found in Warhammer 40,000: The Rules.
Alternatively, a Guerilla Specialist may choose the following special rule instead:
| The best foe is one incinerated into cinders. |
This model counts as being equipped with
assault grenades. However,
cover saves cannot be taken against Wounds caused by promethium charges in the
Shooting phase.
Kill Teams are rarely called upon to engage in open war, where their unique talents would be lost in the mayhem of battle. Instead, they are sent to forge deep into no man’s land to sow discord and disruption in a series of daring raids. Here, we present the rules for using your Kill Team, and six unique and challenging missions for them to play.
There are six
missions to try out in your games of Warhammer 40,000: Kill Team. Each mission has its own special rules, objectives and challenges. Regardless of the mission, they all share a few variations to the normal Warhammer 40,000 rules which you must adhere to in order to play Kill Team, all of which are presented below:
Skirmish Battlefield: All
Kill Team missions are designed to be played on a 4'x4' battlefield.
Every Man for Himself: Most models in a Kill Team are selected as part a squad. However, when deploying your Kill Team, and throughout the course of the game, each model is treated as a separate unit. This even includes models that are selected as wargear options for a unit, such as Tau Empire
Drones or Space Wolves
Fenrisian Wolves. If a model has the
Independent Character special rule, it cannot join another model to form a unit of two.
Transport Vehicles:
Transport vehicles can carry a number of models equal to their
Transport Capacity (but following all of the normal restrictions), regardless of which unit they were selected from during Kill Team selection. However, only models that were selected as part of the same unit during Kill Team selection, and were assigned a Dedicated Transport, can begin the game embarked upon their Dedicated Transport.
You’re on Your Own:
Psykers cannot use
conjuration powers in games of Kill Team. Furthermore, the
Reserves rule is not used unless as a result of the
Outflank special rule. Models cannot enter
Ongoing Reserve by any means. If any models in your Kill Team can normally only be deployed via
Deep Strike, simply deploy them along with the rest of your army.
Scoring Units: Unless specifically stated otherwise in their rules (e.g. a Tau Empire Drone), all models are
scoring units.
Psychic Solitude: The
Brotherhood of Psykers/Sorcerers special rule has no effect in games of Kill Team.
Break Tests: If, at the start of your turn, more than half the total number of models in your Kill Team have been destroyed (or otherwise been removed from play), your force is
Broken. From that point on, each of your models must make a Break test at the beginning of each of your
Movement phases, including the turn on which your force was
Broken. Starting with your Leader (if they are still alive), each of your models must make a
Leadership test. If the test is passed, all is well and the model bravely fights on as normal; if the test is failed, your model flees from the battlefield and is immediately removed as a casualty. Vehicles and models with the
Fearless special rule automatically pass Break tests. Models with the And They Shall Know No Fear special rule re-roll failed Break tests.
Command Range: Your Leader has a Command Range of 6". If your force is
Broken and your Leader passes his
Break test, all friendly models within his Command Range automatically pass their Break tests.
Codex Exceptions for Kill Team Missions
The
Warp Storm and
Daemonic Instability special rules are not used in Kill Team missions. All Daemon models have the
Fearless special rule instead.
Codex: Chaos Space Marines: The
Champion of Chaos special rule Is not used in Kill Team missions.
Codex: Cult Mechanicus: The
Canticles of the Omnissiah special rule is not used in Kill Team missions.
Codex: Khorne Daemonkin: The
Blood for the Blood God! special rule is not used in Kill Team missions.
Codex: Orks: The
Mob Rule special rule is not used in Kill Team missions.
Codex: Skitarii: The
Doctrina Imperatives special rule is not used in Kill Team missions.
Codex: Tau Empire: Drone models are non-scoring units in Kill Team missions. Drones do not have the
Bulky special rule.
Kill Team Mission Secondary Objectives
Each Kill Team Mission uses some or all of the following Secondary Objectives, shared by both players:
If, at the end of the game, the enemy’s
Leader has been slain, you score 1
Victory Point. If the enemy Leader fled the battlefield as a result of a failed
Break test, a Victory Point is not awarded.
If, at the end of the game, you have at least one model in the enemy’s
deployment zone, you score 1
Victory Point. Models that are
Falling Back or that have
Gone to Ground do not count.
If the first model to be removed as a casualty during the game was part of your opponent’s Kill Team, you score 1
Victory Point.
If, at the end of the game, you have completely destroyed more than half of your opponent’s models, you score 1
Victory Point.
There are two ways that you can choose which Kill Team mission to use. The first is to agree with your opponent which Kill Team mission to play. The second is to pick randomly by rolling a D6 and consulting the following chart:
The Next Mission and Beyond
Once you have assembled your Kill Team and taken them to battle, there’s a good chance you’ll be hooked. But where can a player go next? There are many opportunities to change up the game in new ways, and we’ve presented a few additional ideas and guidelines here, just to get you started. It’s time to take your games of Kill Team to the next level.
Kill Team battles are fast-paced, meaning players can work their way through the six standard missions pretty quickly. So what other types of battles can a finely honed Kill Team of elite warriors fight? The simplest way to expand the types of games available to you is to break the rules a bit; pick some part of your favourite mission and change it to create a different challenge or twist to the battle. Players might even agree to alter force compositions to suit the mission, the available terrain, or their model collections. Simple variations, such as allowing a warrior to select additional wargear, or allowing an additional Elites choice, can vary Kill Teams greatly. The key, of course, is to break the rules for the right reason – that is, to create a characterful, action-packed battle rather than to create an advantage for one side or the other. An unstoppable Kill Team that wipes out its opponent with ease is not the goal. An enjoyable battle where the outcome is in doubt until the very end should be the objective.
Those are some ideas just to get you started creating a slew small-scale battles in the 41st Millennium. You can use the existing missions and the tweaks suggested above to run sabotage actions, lightning raids, suicide missions and more. If you’re looking for more inspiration, though, read on.
If you have a gaming group of several people, tournaments can be a great way to get everyone together to play for bragging rights as the best Kill Team general. Gather as many of your gaming group as you can, and then play through a series of Kill Team battles. Make sure everyone plays as many opponents as you have time for. There are plenty of different ways to determine a winner, but you don’t need to. You could also just keep a rolling tally of wins, loses, and draws for as long as the group likes – you might find that some Kill Teams get a bit of a reputation!
If you do want to play for first place, you might assign a points system to the games. For instance, the winner of each game gets 3 points and the loser gets 1 point, while both players get 1 point in the case of a draw. The winner would be whoever has the most points after a set number of games. Similarly, you could set up a series of knockout games using a bracket tournament system. This can work whether you have many players, each with their own Kill Team, or only a few players who each bring multiple Kill Teams. In the latter case, you might want to use random selection to pair players for each battle. Tournaments like these are easy to set up and organise, and also very satisfying to participate in.
For those looking for narrative battles based in the backdrop of the 41st Millennium, it is easy to create your own evocative, story-telling games. From Black Library novels to cinema blockbusters, there is plenty to inspire the context for the do-ordie missions of your Kill Team. By linking several such battles together, players can create campaigns. For instance, a Space Marine Kill Team might be trying to infiltrate a cell of Nurgleworshipping cultists. At first, the mission seems straightforward, but they discover a nest of plague zombies. They have to stop the monsters before they spread their affliction any further. Whether or not they succeed, they must then escape the corrupted hive by reaching a distant extraction zone. Each of the points in this story hold the key to a Kill Team battle. An injury chart, or simple dice roll of 4+, can be used to determine if fallen members recover in time to rejoin the Kill Team for the next battle.
Kill Team Challenge Games
In a challenge game, one player selects their Kill Team as normal, whilst their opponent fields a larger or more powerful force. Depending on the nature of what the Kill Team is up against, you may want to adapt the force organisation rules, perhaps increasing the number of
Specialists, or even picking a Specialist skill that applies to every member of the Kill Team. Here are some suggestions for exciting challenge games:
| The Orks want to deploy a vast war machine, but it is not yet operational. This means a Kill Team of Catachan Jungle Fighters can still stop the carnage it will surely unleash. They must sabotage it in a race against time, for if all that firepower goes online, the giant engine of war could be unstoppable… |
All the members of your Kill Team have the
Tank Hunter special rule. Your opponent’s force consists of a single
Super-heavy vehicle or
Walker. It is powering up, so cannot move or fire any of its
Primary Weapons until it is powered up. To represent this, use
Variable Game Length not to determine the end of the game, but to determine when the Super-heavy vehicle becomes fully operational, after which the game becomes a battle to the death!
| A Kill Team of Tau Fire Warriors, representing the last of their hunter cadre, have found themselves surrounded by unnumbered Tyranids. If they can hold on long enough, reinforcements are on the way to extract them. How long will their firepower and tactical know-how allow them to survive? |
Your opponent’s force consists of two
Troops choice units with no points value limit. These units do not use the
Kill Team Mission rules and if they are destroyed, they return to the battlefield from the
controlling player’s table edge at the start of their following turn. Use
Variable Game Length, and if any of your Kill Team is still alive at the end of the game, you win!
| A squad of Space Marines tries to destroy a Necron Lord before it can awaken its tomb world… A band of Skitarii Rangers stalk a Chaos Predator through the burning husks of a great tank battle… A shrine of Striking Scorpions hunt a Carnifex through the forests of a maiden world, determined to slay the beast… |
One player takes a Kill Team, but with double the number of
Specialists. Their opponent controls either a single
Monstrous Creature,
HQ unit or
vehicle that wouldn’t normally fit into a Kill Team game. Make sure the scenery on the board is extra dense to give the Kill Team (or their prey!) places to hide, and if they can defeat their foe in six turns, their mission has been a success and they win! Otherwise, the prey escapes.
Multiplayer Kill Team Games
Due to their small size, Kill Team games are well-suited to multiplayer games with just a few minor changes to the mission rules. The following method caters for up to four players, but with a bit of imagination, could easily be adapted to serve up to 6 players or more!
Instead of deploying as described in the mission, each player rolls a dice and, in descending order, takes it in turns to set up their entire Kill Team anywhere within 9" of a table corner of their choice.
At the start of the game, each player rolls a dice and they take their turns in descending order. This turn order then applies during each subsequent game turn.
In the
Fight sub-phase, only resolve combats which include models controlled by the player whose turn is taking place.
Primary and Secondary Objectives
Depending on the mission you are playing, you may need to tweak the Primary Objective accordingly. As for Secondary Objectives, ignore the rules for
Linebreaker, but players can score 1
Victory Point for each enemy Leader that they kill for the
Slay the Leader objective. Only 1 player can earn a Victory Point for
First Blood, but players earn 1 Victory Point for each enemy Kill Team that is broken at the end of the game.